Do you process your own deer? Why not? You have already placed yourself through the toughest point of presenting meat in your table. So why wouldn’t you take a few hours to guarantee you have the cleanest cuts available? It’s simpler than you imagine and quicker than waiting for your neighboring processor.
I am going to share with you a useful guide on processing a deer on your own from the woods to the table.
What’s The Primary Thing to Do After You Have Taken Down a Deer?
First, be completely sure your deer is dead. Next, take a moment to relax and breathe. Then, you should look for a shady place to field dress.
What Do You Really Need?
All you truly need is a sharp and strong blade. Note that you should only use this knife for this cutting process.
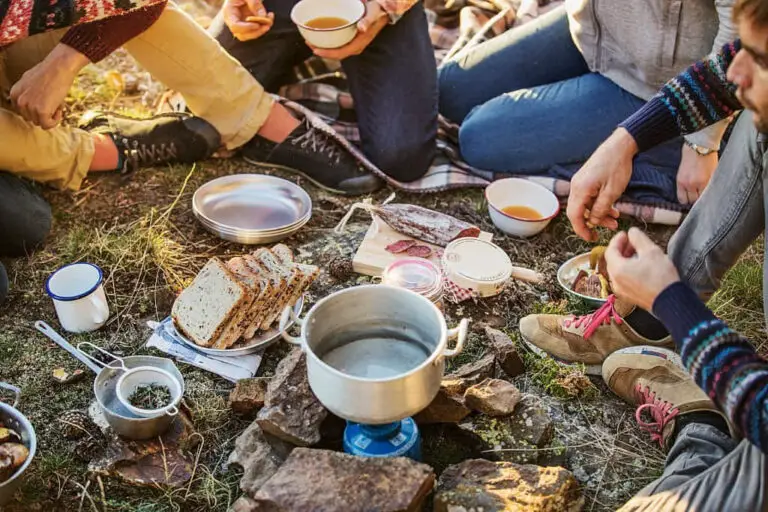
Likewise, you will use things like latex gloves, cutting boards, saw, bowls, clean water, plastic wrap, freezer bag, tape, and paper towels. Now you are ready to field dress your deer!
So, How to Field Dress?
Position Your Deer: when you field dress, proper equipment must be close and well-prepared. Wear your gloves. Turn your deer and lay it on its back. Spread out its hind legs. Situate the deer’s head a little uphill. Do this so that the deer’s blood is completely drained.
Make A Cut On Your Deer
The first task is to remove the reproductive organ and testicles. Point your knife towards the mammary gland, then make your first cut. Use that tear as an access point for the rest of the process.
With your knife, basically, shove the tip into the skin and start the course of cutting in an upward movement, then stop before the breastbone. Please keep in mind that you have to keep pointing the tip of the blade upwards to avoid the intestines, or guts of the deer from getting punctured.
Cut Your Deer’s Trachea
Get into the throat of the deer using your hand and find the trachea tube. Cut it once you have located it.
Remove The Organs
Begin cutting the deer’s connecting tissues of every organ. Make sure that you remove the organs one by one. You have to pull out these two organs first from the chest cavity region: the heart and lungs.
For the next two organs, you need to pull out the intestines and stomach from the lower cavity area.
And the last two organs you need to take out are the bladder and the large intestine from the lower part. To take it out safely, you need to cut from the hind legs down to the anus to expose the pelvic region.
Drain Your Emptied Deer
Flip back your emptied deer with its legs spreading wide and leave it resting on an inclined place to drain. You should keep the deer in this pose so it can drain appropriately.
You can also keep the carcass open with the help of sticks so it can cool down faster. You can as well hang the deer for about 20 minutes if a tree is available.
Now, if you could field dress a deer, you should have no issue with the next step, the Skinning.
How Do You Skin Your Deer?
Hang Your Deer Up
You can definitely skin a deer laying down on a surface since the process is the same. However, if a deer’s body is hanging up, you can move the deer carcass more easily and make the procedure less exhausting. You should hang your deer up on a tree or a tractor.
Whether to hang the deer with its head or hindquarters up is still debatable, but it is certainly better to have it hang up.
Cut and Twist Elbow Joints
At the elbow, you need to begin cleaning from the hooves. Use your sharp blade and look for the elbow joints.
Cut the ligaments, and make it deep as you can. Then cut the joints of the elbow, bend it firmly and it will simply break down.
Make Cuts On The Skin
If the deer’s body is hanging by the head, the next thing you need to do is to cut the skin at the base of the skull around the neck, down towards the chest, into the abdomen and at the back of the forelegs.
However, if the body is hanging at the base, the series would be reversed. Just be cautious in cutting because you ought not to cut the muscles or stomach tissues. There is a great chance that if you cut the organ by mistake and it will contaminate your meat. So, be careful!
Start Skinning
Now, if your deer hang with the head up, grasp the skin tightly at the neck and draw it descending toward the chest, just like pulling off your pair of tight wet jeans. If your deer hang with its hindquarters up, start at the entry point you made in the lower leg.
Don’t get stressed if the scrape comes with the hide since it simply helps take out the skin. Also, you can slice the tissue to make your skinning easier and entail less time.
Cut the Head Off
To cut the head, you have to put down your deer and place it on a level surface. Then, cut the connective tissues surrounding the neck and use a saw to slash the head off. Some removed the head before they hang it.
Rinsed Off
We hunters wanted to rinse the carcass with cold running water just like from a garden hose, though a bucket of water will typically be enough.
So, by now you have dressed, skinned and rinsed the deer carcass, it’s time to age the meat.
So, How To Age Your Venison?
Dry The Carcass
You have to set aside the carcass to dry and cool it. It must also be stored at a temperature of about 34 to 48°F, however, abstain from solidifying the carcass.
Get A Safe Place
You have to choose a suitable place for ageing the meat. The area must have a controlled temperature and be closer to your abode, such as your garage.
Don’t have any garage for ageing the meat? Then, you can contact other hunters or a secure place for ageing your meat.
Hang Your Venison
If you already have a suitable place, hang your carcass up. You can use a rope and a metal hook to attach the meat. Also, you can use an old wire hanger or chain to hang the venison in the aging place.
So, how long do you have to hang the carcass? It’s essential to put it in a cool area around 32 and 42 degrees F for no less than a week, though, 16 to 21 days is the average period of aging.
Once aged, it’s time to start cutting and wrapping your venison.
How To Cut And Wrap Venison?
Set Up Your Working Place
First of all, you have to set up a good and clean surface area where you can work with your tools. A convenient picnic table could be a fine place to do the cutting process.
Cut the Shoulder
With the deer hung at the base, the first part of the deer you have to butcher is the front shoulders. You must pull it far from the trunk of the deer to uncover the pass-through cut zone. Then cut the shoulder joint with your knife parallel to the rib cage.
Remove The Backstraps
Shear off any extra fat that has formed in backstraps. Then, you have to look for the crooked part of the hip bone. You will simply cut below this bone and to the backbone (both sides).
After that, you will now have to run your blade down, along the spine and all the way throughout the neck. Then go back to your first cut and take the time to remove all the valuable backstraps.
Trim The Neck Meat
You need to remove the meat from the cut of backstraps and skin the neck bone. Then, work on the top of the deer’s neck to its windpipe.You can also scrape any meat left on the front half of the carcass if you want to, it will be great for grinding.
Cut the Carcass into Half
After cleaning the front half, you must look for the rib cage and spine intersection and cut it using your saw. You could simply separate the quarter by twisting hindquarter to the legs.
Trim the Rest of the Rump Roasts and Legs
But before doing this, you must cut the sirloin from the knee to the hip. Work your blade parallels with leg, then turn it 90 degrees and finish the cut.
Now, begin cutting on the back of the leg and just beneath the Achilles’ tendon. Work on this cut surrounding the knee and keep cutting all the meat off the leg and the pelvic skeleton.
Trim All Remaining Meat
Now, it’s time to remove all remaining meat from uncovered bones, which we can use for ground or stew meat counting the shoulder, ribs.
What Are The Steps In Storing The Deer’s Meat?
Slice The Steaks
Typically, it’s more practical to cut the steak into slices before freezing it. This way, you will not be stressed out about thawing a large part of the steak, just one slice at a time.
But before that, you need to remove the extra fat, the discoloration, and dry spot of the meat. Then, cut the steaks into small parts and keep every group in separate bags.
Pack the Venison
The last step of all the process is packing the steaks. You can use plastic wrap or bags to keep the venison in the chiller or refrigerator and seal the plastic bags securely. In addition, label and add the date to the plastic bag.
The Venison Cuts And Their Cooking Method
- Stew Meat: braise.
- Loins (Backstraps): broil, sauté, BBQ, roast, frying, baking.
- Roast: Roast, braise, BBQ.
- Steak: grill, fry, broil.
- Ribs: fry, smoke, grill, braise, roast.
- Osso Buco: braise.
- Heart: broil, bake, grill.
Several venison recipes I enjoy
Grilled Bacon-Wrapped Venison Tenderloin
Ingredients
- 1 pound of venison tenderloin
- 1 cup sweet white wine
- Meat seasoning: paprika, garlic, cumin, thyme, onion powder, salt
- ¾ Pound bacon
- Cherry wood (for smoking on grill)
- pepper (your choice)
Directions
- Marinate the venison in a cup of white wine.
- Season the venison with your preferred spices and herbs.
- Wrap the venison in bacon strips and use some toothpicks keeping the strips in place.
- Grill venison tenderloin until medium-rare, every minute on every side.
- Close the grill and indirect heat, cook for extra 30 to 45 minutes above.
- Internal temperature must read 145 to 160 F.
Read More: Elk Hunting: Is the 7mm 08 a Viable Cartridge?
Fried Venison Backstrap Recipe
Ingredients
- 1 (2 pounds) venison backstrap, cut into 1/4 inch thick slices
- 2 tablespoons hot pepper sauce
- 2 cups milk
- 1 tablespoon ground black pepper
- 1/2 cups milk
- 2 tablespoons salt
- 2 eggs
- 3 cups vegetable oil for frying
- 3 cups all-purpose flour
Directions
- Place the venison slices into a shallow bowl and pour in the milk and hot sauce. Stir to coat, then cover and marinate for 1 hour.
- Heat the vegetable oil in an electric skillet to 325 degrees F (165 degrees C). In a shallow bowl, whisk together the eggs and milk. In a separate bowl, stir together the flour, salt and pepper.
- Dip the venison slices into the flour, then into the egg and milk, then back into the flour. Shake off excess flour. Fry in the hot oil until lightly browned on each side, about 3 minutes. Remove with tongs and drain briefly on paper towels before serving.
I hope this helped you a bit in understanding how to process a deer. Just bear in mind that the process that takes a while now will soon happen to a 20-minute task in the near future. Great, isn’t it?

I’m Cindy, a free-spirited outdoor enthusiast. Since childhood, Our family frequently goes on weekend camps and my father, who was a skilled hunter, used to teach my siblings and me valuable things about wildlife survival. I made this blog to share my knowledge, experiences, and tips.